It’s easy to attribute a failed Raspberry Pi project to a fried GPIO pin, a corrupt SD card, or software issues that prevented the board from doing its job. And while those things do happen, they are few and far between.
There’s no shortage of simple Raspberry Pi projects you can finish in a weekend. But the reasons why most of these projects end up collecting dust are far quieter, embarrassing, and far more preventable.
I skipped the Raspberry Pi this time and don’t regret it
The Pi 5 used to be the obvious choice for a lightweight Linux box. It no longer is.
The project that quietly spirals out of control
Scope creep turns simple ideas into never-ending builds
Let’s say you set out to build a simple home media server. As you’re about to finish a project, you feel that adding a VPN to access it remotely is also a good idea. Just as you’re about to finish that, you think that adding a Copyparty instance for file storage and a Pi-hole for ad blocking would also be great additions. Before you know it, you’ve got half a dozen services running in Docker, a custom nginx reverse proxy you may or may not fully understand, and a weekend that you didn’t step foot outside the house.
This is called scope creep, and it’s one of the most common reasons why Raspberry Pi projects end up unfinished. It rarely announces itself, and it’s very hard to see it coming. It starts with small improvements—one more feature, one more service, one more addition that would be cool to have. By the time you realize you’ve gone too far, the project often becomes an unrecognizable mess. You’re so deep into it that starting over would mean losing serious progress, but finishing too feels next to impossible.
The fix is quite simple: clearly define what your project will do before you start building it. If your goal is a media server, write that down. Put it somewhere visible. Every time you feel the need to add something new, ask yourself whether it directly contributes to the original goal. If it doesn’t, it’s probably better off as its own project. The Raspberry Pi can do a lot, but it doesn’t need to do all of it together.
Power is the problem nobody plans for
Undervoltage, instability, and why things randomly break

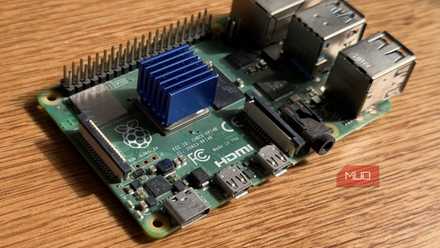
The Raspberry Pi has always needed a stable 5V power supply to run properly. Inadequate or unstable power is one of the most common and underestimated issues in the Pi ecosystem. That old phone charger you’re using might be fine when your Pi is idling, but under load, its output can often drop below the minimum required (5 volts), and this can cause all sorts of problems on the Pi. Even something as simple as a RetroPie console on a Raspberry Pi 3 also requires constant 5V/2.5A to work properly.
Generally speaking, if the Pi isn’t getting enough power, it’ll throw up a visual indicator on the screen and continue to run in a degraded state. If you’re running a headless project or don’t have a display, you won’t see the undervolt warning on the GUI, giving you very little chance of diagnosing power-related issues in your project correctly. To make matters worse, while running in an undervolted state, the Pi might start writing half-finished data to the SD card, corrupting the file system over a period of time. Your Pi might look like it’s running fine, but power issues will eventually catch up, and likely cost you your Raspberry Pi OS installation.
The Pi 4 needs a reliable 5V/3A supply, and the Pi 5 needs even more headroom. Using an underpowered or low-quality charger, especially if you’re working on a CPU-heavy project, is a recipe for disaster when it comes to the Raspberry Pi. Consider picking a quality power supply alongside your Raspberry Pi, and if you’re running a 24/7 headless setup, consider booting from an SSD over USB rather than relying on a microSD card for your root filesystem.
- Brand
-
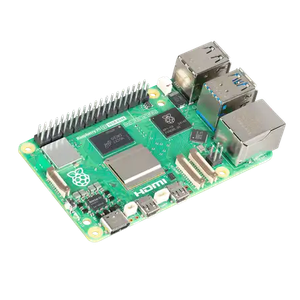
Raspberry
- CPU
-
2.4GHz quad-core 64-bit Arm Cortex-A76 CPU
- Memory
-
16GB LPDDR4X
- Ports
-
4 USB ports, GbE, microSD, 2 mini-HDMI ports
The knowledge gap you didn’t know you had
Where missing fundamentals derail otherwise simple projects

This is hard to talk about because not a lot of people like admitting it, but if you’re new to the Raspberry Pi and you’ve taken on a technically difficult project, you might run into knowledge gaps you didn’t know you had. Working with the Pi not only requires Linux knowledge, but also hardware and microcontroller expertise. Not to mention the coding ability to bring it all together.
A lot of projects also fail at the headless setup phase—SSH not connecting, Wi-Fi not showing up on the network, and an SSH file that was added to the wrong partition. This isn’t a hardware failure. It’s a knowledge gap in networking, one of the areas you’ll need basic knowledge of in order to make your projects work.
The Raspberry Pi community has a complicated relationship with documentation. Not in the sense that it doesn’t exist, it does and is often excellent, but it’s scattered across the internet. You’ll find useful gems buried anywhere from the official documentation, random Stack Overflow threads, and forum posts that haven’t been active for a few years now. A beginner following a tutorial for a project on a particular Raspberry Pi OS version can very easily hit walls that have nothing to do with their ability or hardware.
There’s one reason behind all of this
Why most Raspberry Pi projects fail the same way
If you step back and take a closer look at why most Raspberry Pi projects fail, you’ll realize that none of it has to do with hardware skills or Linux knowledge. Most of them are the result of planning failure. Scope creep happens when you don’t clearly define a goal. Power failures happen when you focus too much on the board without knowing how to properly run it. And knowledge gaps bite the hardest when you dive in without knowing what you’re up for.
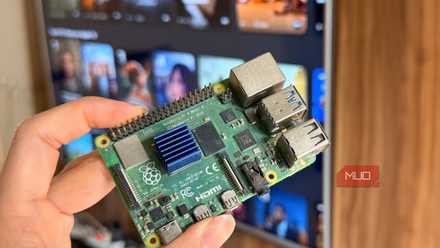
My Raspberry Pi streaming box was perfect until I started using it
I installed Android TV on a Raspberry Pi and learned exactly where DIY hardware meets its limits.
The solution isn’t to become a Linux expert overnight. The Raspberry Pi is an extremely capable and reliable piece of hardware. It won’t fail you as often as you fail the project by underestimating the boring research. Nail down what you’re building, buy the right parts for it, and verify your documentation before you get started. Actually building projects is a lot more fun when you’re not troubleshooting strange errors every 10 minutes.