
Labubu monsters, those little toothy creatures from Pop Mart, are taking over and we can’t get enough of them. One maker chose a different approach: fire up the 3D printer and build one from scratch.
Tinkraft starts by looking for a digital file that matches the original design. Free models appear on sites such as Printables and Cults3D, where artists distribute STL files inspired by Kasing Lung’s artwork, the Hong Kong-born creator responsible for Labubu’s success. He finds one labeled “Labubu Pop Mart Original Version”, a single piece model that’s perfect for first timers. These files are ready to use, scaled to around 130mm tall to meet the 5 inch mark.
Sale

Bambu Lab A1 Mini 3D Printer, Support Multi-Color 3D Printing, Set Up in 20 Mins, High Speed & Precision,…
- High-Speed Precision: Experience unparalleled speed and precision with the Bambu Lab A1 Mini 3D Printer. With an impressive acceleration of 10,000…
- Multi-Color Printing with AMS lite: Unlock your creativity with vibrant and multi-colored 3D prints. The Bambu Lab A1 Mini 3D printers make…
- Full-Auto Calibration: Say goodbye to manual calibration hassles. The A1 Mini 3D printer takes care of all the calibration processes automatically,…
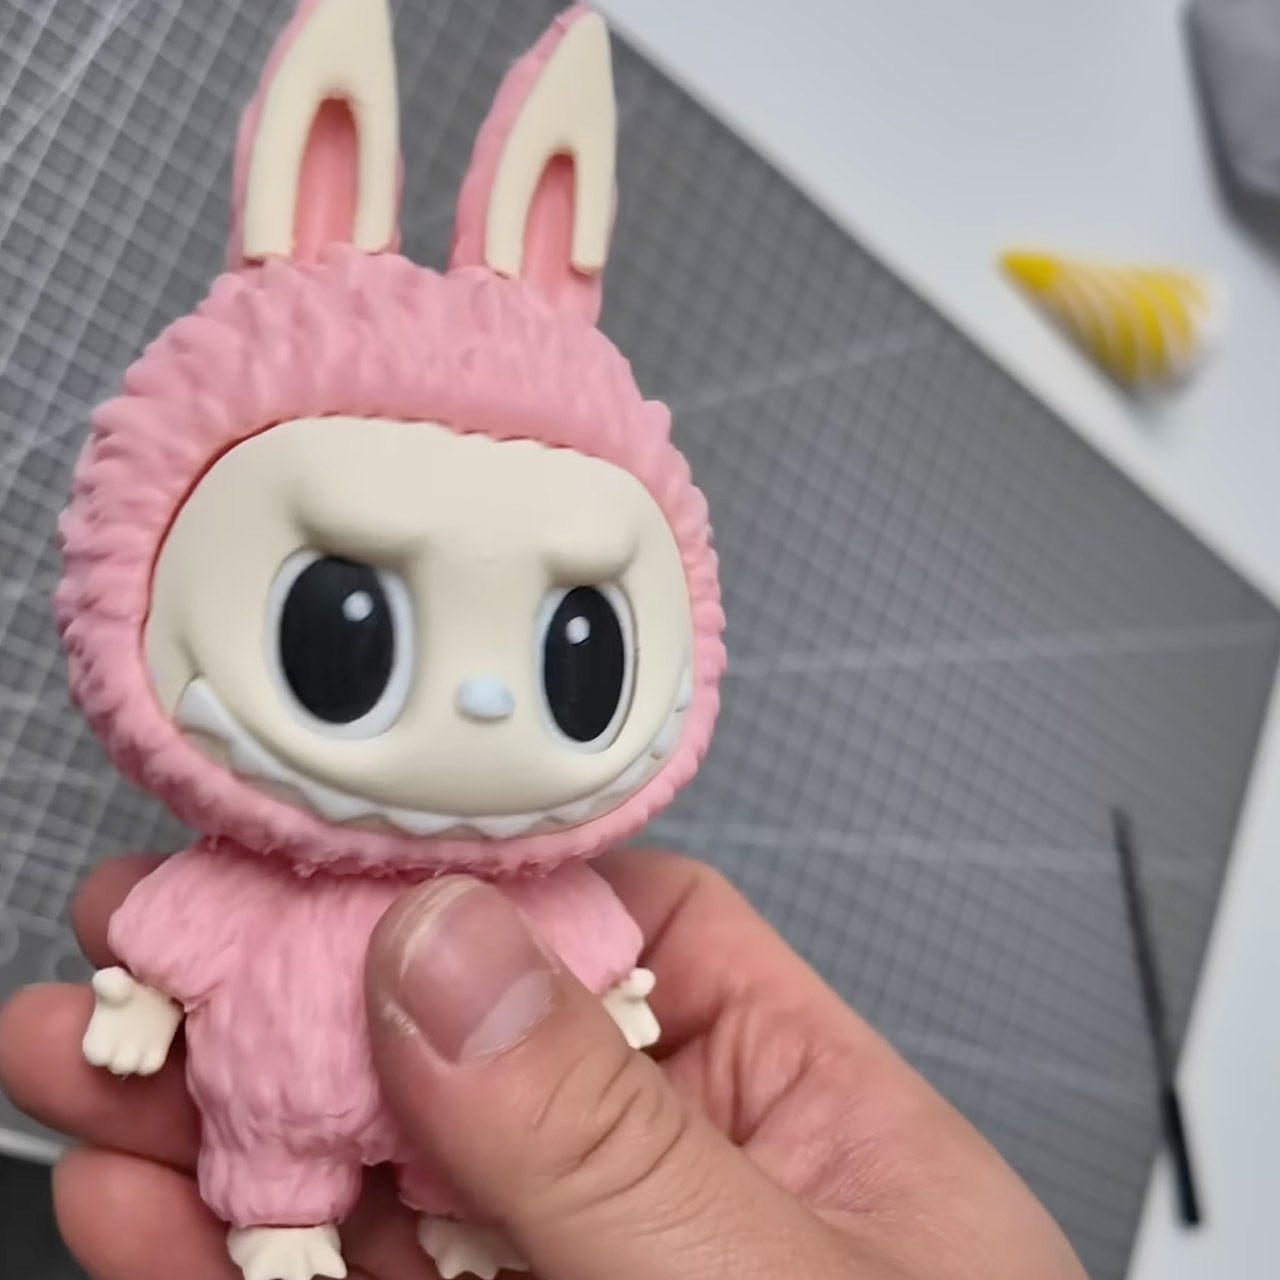
The next step is to use slicing software to convert the raw file into printer-friendly instructions. Cura and PrusaSlicer are useful programs for building down layers and determining where supports are required. Tinkraft imports the STL file into Cura, a free application that comes with most home printers. He changes the detail settings without going on indefinitely: 0.2mm layer height for excellent curves on those enormous ears, 50mm/s print speed to keep things moving, and bright pink PLA filament to match the official colors. The infill is 15%, sufficient to support the figure without wasting material.
Post-processing takes the raw print and turns it into something shelf-ready. Tinkraft peels away supports with flush cutters, being careful to avoid delicate horns and fingertips. A sanding stick removes burrs on the base, allowing it to lay flat and wobble-free. This time, no paint is required; the pink filament gives the color on its own; but, if gloss is wanted, a clear coat spray can be applied.
